![]()
![]()
![]()
![]()
![]()
![]()
![]()
![]()
![]()
![]()
![]()
A RANGE OF 7mm SIGNALS CAN BE MADE TO MADE TO ORDER, WITH PRICES STARTING FROM £130. (SUBJECT TO CHANGE DUE TO MASSIVELY INCREASED MATERIAL AND ETCHING COSTS) PLEASE NOTE THIS IS ONLY A HOBBY AND NOT A BUSINESS SO CONSTRUCTION TIMES ARE SUBJECT TO LIFE SOMETIMES GETTING IN THE WAY!
PLEASE EMAIL OR PHONE WITH YOUR REQUIREMENTS. DUE TO PACKAGING REQUIREMENTS ALL SIGNALS WILL BE SUBJECT TO P&P.
SEE BELOW
FOR GENERAL SPECIFICATIONS AND AN IDEA OF LIKELY COSTS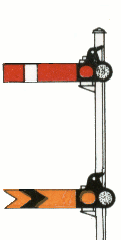
|
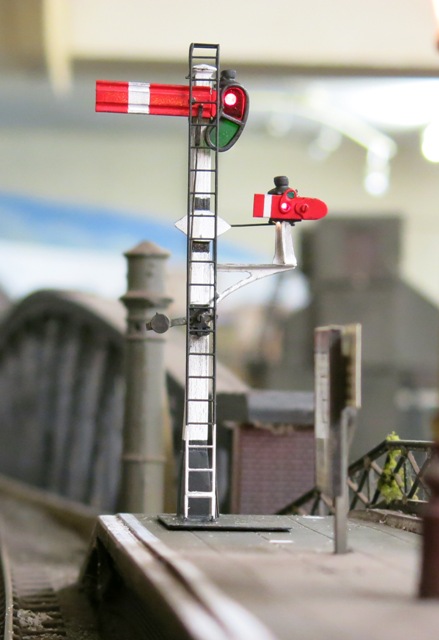
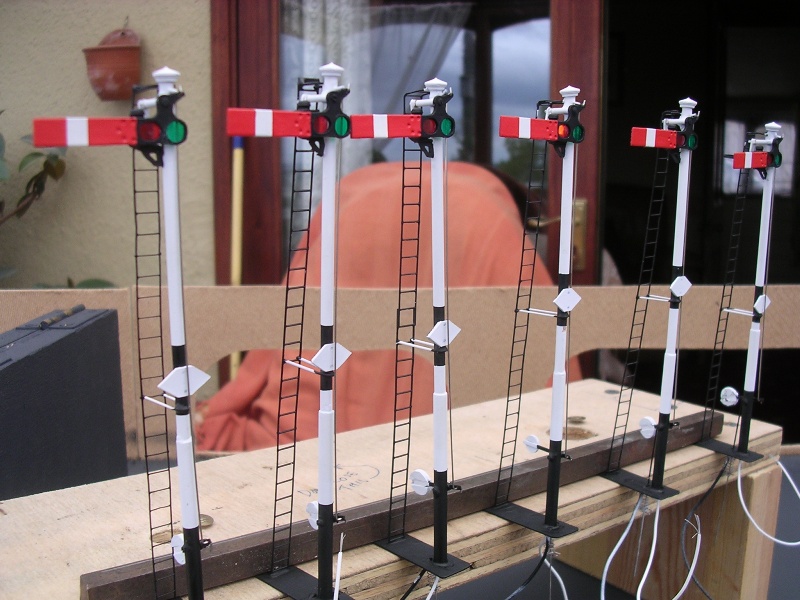
-------SIGNALS--------- I was a signalman on BR, Railtrack and Network Rail for nearly 40 years, and I have developed a passion for semaphore signals and traditional signalboxes. While working at Chester PSB I got involved with a friends gauge 0 layout (now sadly gone) and offered to build signals for it. As there were going to be quite a few upper quadrants, to save money I made my own masters for signal arms, lamps, backlight blinders etc and set about casting almost all the parts I needed although I have now (2026) upgraded and improved many of the parts I used. I no longer use any of the parts I used to cast! Visitors to the layout have subsequently ordered a few signals and I have now built over 250 for various customers in the last 17 or so years! Each signal is designed and built to be workable by your chosen method and can be fitted with LEDs in the lampcases (if required). The arms are usually nickle silver from my own etched range. Lampcases and finials are usually Modelu or my own 3D printed. The posts are brass tube or etched nickel silver from my own range. The ladders (flat etch or built up type) and coloured lenses are usually from my own range. Pictures of a small number of them are shown in the Signal Gallery for some of my older ones or the Latest Signals tab for some of my more recent ones.
So how do I order a signal then? Have a think about your track diagram and your needs and ring me up for a chat or send an email with a few ideas. Some basic design points to bear in mind when designing your signals.
|
Fancy some RTR
signals for your layout?
As stated above, I can build a range of 7mm scale signals to order. The signals I have built so far are mainly ex LMS tubular post upper quadrants but I've branched out to encompass most UK railway semaphores. I can work to photographs and drawings or I can design signals as required but the main dimensions for the Upper quadrants are from the excellent and now recently re-printed book, "LMS Signals" by L.G.Warburton. The general specification for example, an LMS tubular post upper quadrant is as follows:- Main posts from brass tube, soldered. Arms are from my own slowly expanding range of etches Brass sheet baseplate, standard size 50mm X 32mm Whitemetal castings or 3D printed items for lamps, some of the post caps, and other sundry post fittings. Etched Nickel Silver trimmers (the horizontal supports to which each of the "dolls" are fixed) 0.8mm plywood for landings/staging. N/S wire, strip and tube for all necessary operating rods and cross shafts. Etched cross shaft brackets and operating arms and "Return to danger" springs fitted if required. Brass or nickel-silver wire for safety railings around landings. N/S etched or built up ladders as required. Warm white 12v rated LEDs fitted to each lamp wired to positive side with rest of signal as negative (if requested.) Sprayed with primer then finished with appropriate enamels. Light weathering at no extra cost. How much are they likely to cost? As a rule an illuminated tubular construction straight post signal will cost (£130) with one arm plus (£80) per additional arm to a max of 3 arms.(4 if all are shunt arms) A similar specification bracket signal will cost (£240) with one arm plus (£90) per additional arm to a maximum of 4 dolls or posts with a maximum of 6 arms in total over entire signal. The maximum number of arms on each signal reflects what I can reliably guarantee to work! More than that is possible but the workings become a bit too crowded and cumbersome. The signals are normally built using my own flat etched nickel silver ladders. Built-Up ladders (Using separate rungs and stiles) assembled from my own ladder kits can be fitted for an extra 20% on the price per signal. Feel free to email or phone to discuss your requirements. Full details in the contacts and ordering page. Please Note!: These prices are a guide rather than a definite quote and may vary as materials prices change.
|